


Discussion on Pre-testing Procedure of 18650 Cylindrical Cell
You need a reliable Pre-testing Procedure to ensure each 18650 cylindrical cell performs safely and consistently. Safety always comes first when handling lithium-ion batteries. You protect yourself, your equipment, and your project by checking cells before use. > Take every step seriously—whether you are new to battery testing or an experienced technician, careful preparation builds confidence and trust in your results.
Key Takeaways
- A reliable pre-testing procedure is essential for ensuring the safety and performance of 18650 cylindrical cells. Follow each step carefully to prevent hazards.
- Conduct a thorough visual inspection to identify any physical damage or leaks. This step is crucial for maintaining safety and performance.
- Monitor temperature and internal pressure during testing. Early detection of abnormalities can prevent dangerous incidents like thermal runaway.
- Use calibrated instruments for accurate measurements. Consistent documentation helps track trends and improves future testing outcomes.
- Always prioritize safety by wearing personal protective equipment and following best practices. This protects you and ensures reliable results.
Pre-testing Procedure Overview
Purpose
You need a clear Pre-testing Procedure to guarantee the safety and reliability of every 18650 cylindrical cell you handle. The main goal is to identify any cell that could pose a risk or fail during use. By following a structured process, you can catch defects early and prevent dangerous situations.
The standard objectives of pre-testing procedures for 18650 cylindrical cells include conducting abuse testing to identify safety limits, ensuring thermal runaway prevention, and implementing stringent quality control during manufacturing to enhance safety and reliability.
A comprehensive Pre-testing Procedure covers several important stages:
- Salvaging: Remove the battery pack and inspect the cells.
- Visual Inspection: Check for physical damage and leaks.
- Cleaning: Clean the cells to reduce contact resistance.
- Charging: Fully charge the cells and monitor temperatures.
- Self-Discharge Test: Assess the cells' ability to hold a charge over time.
- Capacity Testing: Test and label the cells for energy storage capacity.
- IR Testing: Measure internal resistance to evaluate state of health.
You follow these steps to ensure each cell meets the required standards before moving forward.
Importance
You cannot overlook the importance of a thorough Pre-testing Procedure. This process protects you from hazards like short circuits, overheating, or even fires. It also helps you maintain high performance and long-term reliability in your battery packs.
Pre-testing is essential as it involves pre-charging the cell with a low voltage to about 2 V, which is a safe level that prevents corrosion during the manufacturing process. This step ensures that the cells are stable and safe before they proceed to further processing.
Industry standards for pre-testing vary across regions. You must stay informed about local and international regulations to ensure compliance and safety.
| Country/Region | Regulatory Body | Key Requirements |
|---|---|---|
| International | ICAO, IATA, IMDG | UN38.3 test certification, proper classification, packaging to prevent short-circuiting |
| United States | DOT, PHMSA, FAA | 30% SOC for air transport, hazardous materials training, restrictions on damaged batteries |
| European Union | ADR, EASA | ADR training, certified packaging, full documentation |
| China | CAAC, CCC | UN38.3 test reports, MSDS, packaging test reports |
| Japan | METI | UN38.3 compliance, import notifications, Fire Service Act protocols |
| Australia | ADG Code, CASA | ICAO/IATA compliance, ADG Code for road and sea shipments |
By following a robust Pre-testing Procedure, you not only meet regulatory requirements but also build trust in your battery systems. This approach keeps your projects safe and your results consistent.
Pre-testing Procedure Steps

Visual Inspection
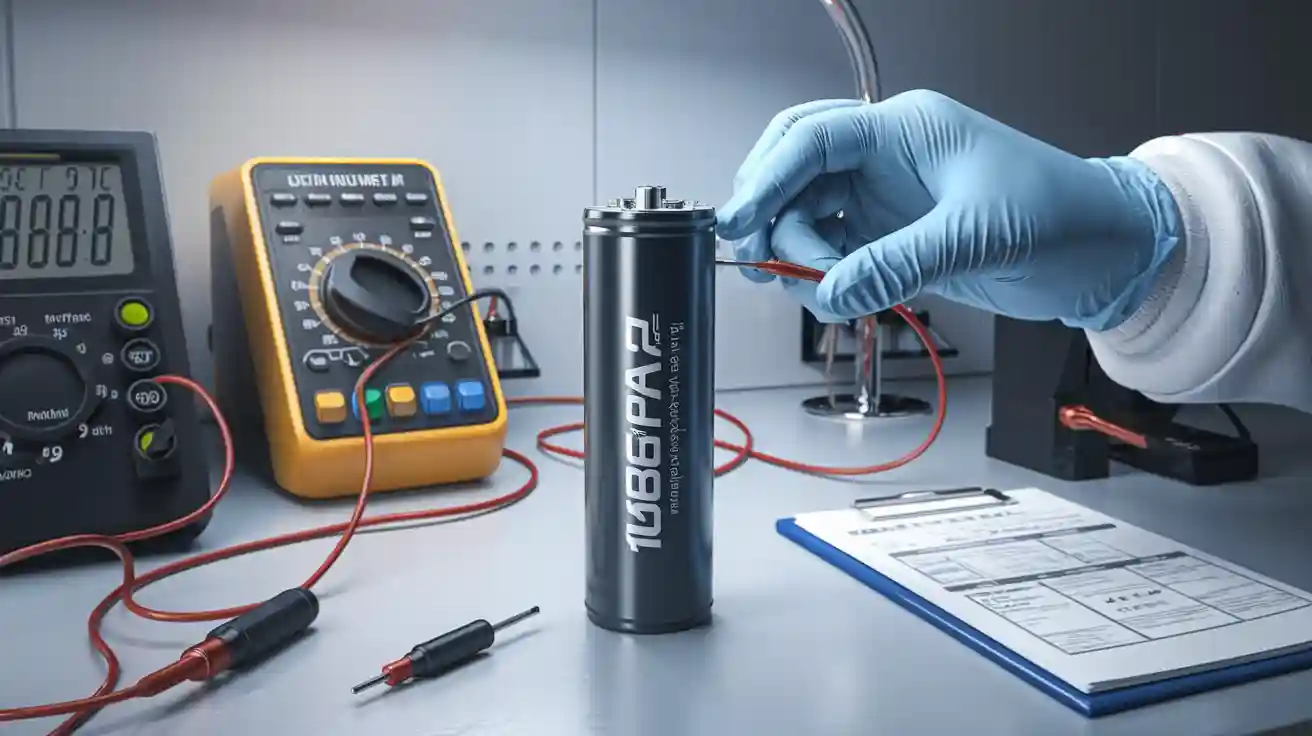
Start your Pre-testing Procedure with a thorough visual inspection. Look for dents, bulges, corrosion, or any signs of leakage on the 18650 cylindrical cell. Examine the insulation and terminals for discoloration or residue. Even minor physical damage can compromise safety and performance.
Tip: Always wear gloves and safety glasses during inspection. Damaged cells may leak harmful chemicals or short-circuit unexpectedly.
If you spot any irregularities, set the cell aside for safe disposal. Never attempt to use a cell with visible defects.
Electrode Coverage Check
Proper electrode coverage ensures consistent performance and safety. You can use several advanced techniques to assess this:
- Galvanostatic Cycling with Potential Limitation (GCPL)
- Constant Current followed by Constant Voltage (CCCV)
- Cyclic Voltammetry (CV)
- Electrochemical Impedance Spectroscopy (EIS)
- X-ray Computed Tomography (CT)
- Advanced microscopy for destructive analysis
For non-destructive checks, laser triangulation and laser caliper measurement help detect coating thickness. These methods use laser reflection and imaging for high accuracy, but temperature changes can affect results.
When you check electrode coverage, focus on:
- Coating thickness
- Surface density
- Surface defects
Note: Inconsistent electrode coverage can lead to uneven current distribution, overheating, or early cell failure.
Voltage and Self-discharge
Measure the open-circuit voltage of each cell. A healthy 18650 cell typically reads between 3.6V and 4.2V when fully charged.
To assess self-discharge, charge the cell fully, then let it rest for a set period (usually 7 days). Measure the voltage drop.
- For a 3.5 Ah cell, the average self-discharge current is about 4.2 µA, with a 10% variance.
- New cells should show minimal voltage loss. Used or degraded cells may lose charge more rapidly.
Safety Reminder: Use insulated tools and avoid shorting the terminals during measurement.
Capacity Test
You need to know how much energy each cell can store. Use a battery analyzer to discharge the cell at a controlled rate and record the total capacity in ampere-hours (Ah).
The measured capacity directly relates to the cell’s lifespan. As capacity drops, the cell’s state of health declines. You may notice a slow decrease at first, followed by a rapid decline as the cell ages.
Cells with significantly reduced capacity will not perform reliably and may fail prematurely in your application.
Internal Resistance
Check the internal resistance to evaluate the cell’s health and efficiency. Healthy 18650 cells typically have an internal resistance between 20 and 80 milliohms.
Elevated resistance can cause:
- Voltage sag under load
- Reduced efficiency due to heat loss
- Shorter operational duration between charges
- Increased heat generation, accelerating degradation
For accurate measurement, use specialized instruments such as:
- XTAR Dragon VP4L Plus Charger (offers consistent readings if probes are placed carefully)
- ACEY-RT200 (provides fast, reliable, and highly accurate results, eliminating human error)
Tip: Always compare your readings to manufacturer specifications and similar cells to spot anomalies.
Internal Pressure
Monitoring internal pressure helps you detect early signs of failure. Pressure build-up results from gas generation during electrolyte decomposition or side reactions.
High internal pressure can signal risks like thermal runaway, especially during abuse scenarios such as overcharging or overheating.
| Aspect | Description |
|---|---|
| Significance of Internal Pressure | Indicates risk of thermal runaway and helps understand cell safety during abuse. |
| Safe Pressure Thresholds | Venting mechanisms and safety devices (like the Current Interrupt Device) are crucial to prevent catastrophic failures. |
| Gas Generation | Caused by electrolyte decomposition and side reactions, leading to performance loss and safety risks. |
| Early Detection | Allows you to take preventive action before failure, fire, or explosion occurs. |
| Real-time Monitoring | Helps track state of charge and health, enabling early detection of hazards. |
You can use strain gauges for non-invasive pressure measurement. These sensors detect mechanical stress along the cell’s length and circumference.
Note: Real-time pressure monitoring provides valuable insights into cell degradation and safety.
Temperature Monitoring
Temperature monitoring is a critical part of your Pre-testing Procedure. Attach a thermocouple to the cell’s surface during charge and discharge cycles.
Monitor the temperature closely, especially during discharge. Discharge the cell until the temperature drops to 10ºC below the peak value.
- Limit the discharge current to prevent overheating.
- Use a battery management system (BMS) for precise monitoring and control.
Thermal runaway tests should be conducted in explosion-proof chambers for maximum safety.
Safety Alert: Always wear hearing and eye protection when testing cells under stress. Sudden venting or rupture can cause injury.
Temperature monitoring helps you detect abnormal heat generation, which may indicate internal faults or impending failure. Early intervention can prevent dangerous incidents.
Result Evaluation
Good vs. Bad Cells
You need to distinguish between good and bad 18650 cells after pre-testing. Good cells show no physical damage, maintain stable voltage, and deliver capacity close to the manufacturer’s rating. They also have low internal resistance and do not overheat during testing.
Bad cells often display one or more of these issues:
- Dents, bulges, or corrosion on the casing
- Rapid self-discharge or unstable voltage
- Low measured capacity (significantly below rated value)
- High internal resistance (above 80 milliohms)
- Abnormal temperature rise or pressure during cycling
| Criteria | Good Cell | Bad Cell |
|---|---|---|
| Physical Condition | No damage | Dents, bulges, corrosion |
| Voltage Stability | Stable | Unstable, rapid drop |
| Capacity | Near rated value | Much lower than rated |
| Internal Resistance | 20–80 mΩ | Above 80 mΩ |
| Temperature/Pressure | Normal during cycling | Abnormal rise |
Common Mistakes
You might overlook subtle signs of failure if you rush through the process. Skipping visual inspection or ignoring small dents can lead to dangerous outcomes.
The mechanical mode of failure appears to be the most perilous one, compromising the battery safety in case of a mishap. In this mode, the battery or the casing undergoes deformation due to external loads that are mostly impulsive in nature. The load from the casing gets transferred to internal components of the battery, rendering them deformed. This leads to failure of the internal components such as separators and contact is attained between separator and cathode.
Another frequent mistake involves neglecting to monitor temperature or internal pressure. You risk missing early warning signs of internal short circuits or thermal runaway.
Lithium-ion battery failures, particularly in the case of high-speed collisions in electric vehicles, have become a growing concern. This study investigates the failure mechanism of an 18650 cylindrical battery which is indicated by the occurrence of an inner short circuit at various loading rates.
Practical Tips
You can improve your results by following a few best practices:
- Always use personal protective equipment (PPE) such as gloves, safety glasses, and hearing protection.
- Label and document each cell’s test results for future reference.
- Compare your measurements with manufacturer specifications and similar cells.
- Store questionable cells in a fireproof container until you can dispose of them safely.
- Use calibrated instruments for all electrical and physical measurements.
Tip: Consistent documentation and careful observation help you spot trends and prevent future failures. If you have doubts about a cell, err on the side of caution and remove it from service.
You protect your projects and yourself when you follow a thorough pre-testing procedure for 18650 cells. Each step, from visual inspection to advanced checks like internal pressure and electrode coverage, builds a strong safety record for your battery assembly.
| Evidence | Explanation |
|---|---|
| Thorough pre-testing | Ensures quality and reliability of battery cells before assembly, preventing safety issues like thermal runaway. |
| Series of tests | Verifies electrical and physical properties of cells, ensuring only high-quality cells are used in assembly. |
You should always use proper safety equipment and follow best practices. Leading studies, such as those by Sahraei et al. (2012), and research on battery components and mechanical behavior, support these methods:
- Initial tests and models for 18650 cells
- Focus on lateral properties, axial deformations, and three-point bending tests
- Characterization of electrodes and separators for pre-testing
Stay consistent with your procedures to achieve reliable results and long-term performance.
-

 May.2026.05.21IEC 62133 Rechargeable LiPo Battery for Medical Devices GuideLearn More
 -
 May.2026.05.20Custom UL2054 Certified Lithium Polymer Battery Pack: Complete OEM GuideLearn More
 -
 May.2026.05.20Battery for Portable PA System: Complete Guide to Lithium Battery Solutions for Professional Audio EquipmentLearn More
 -
 May.2026.05.19What Battery Is Used in Portable Guitar Amplifiers? A Complete Technical & Practical GuideLearn More
 -
") May.2026.05.15Complete Guide to Portable Amplifier Battery Packs (Li-ion & LiFePO4 Solutions)Learn More
May.2026.05.15Complete Guide to Portable Amplifier Battery Packs (Li-ion & LiFePO4 Solutions)Learn More